DIY Wiring 101: A Practical Handbook For Homeowners
Welcome to DIY Wiring 101: A Practical Handbook for Homeowners! If you’ve ever found yourself staring at a jumble of wires and feeling completely lost, fret not! This comprehensive guide is here to demystify the world of electrical wiring and empower you to tackle your own home improvement projects with confidence. Whether you’re a seasoned DIY enthusiast or a complete novice, this handbook will provide you with all the essential knowledge and practical tips you need to navigate the intricacies of wiring like a pro.
In this article, we’ll cover everything from the basics of electrical systems to step-by-step instructions for common wiring tasks. No more relying on expensive electricians for every little repair or installation! With our user-friendly approach, we’ll break down complex concepts into bite-sized pieces that are easy to understand and implement. We’ll explore the different types of wires, explain the purpose of various electrical components, and guide you through the process of safely wiring outlets, switches, and light fixtures.
So, whether you’re looking to add a new outlet in your home office, upgrade your lighting fixtures, or troubleshoot a faulty electrical connection, this handbook has got you covered. Get ready to embark on a journey of DIY electrical mastery and take control of your home’s wiring like a seasoned pro. Let’s dive in and unleash your inner electrician!

DIY Wiring 101: A Practical Handbook for Homeowners
Welcome to DIY Wiring 101: A Practical Handbook for Homeowners. In this comprehensive guide, we will provide you with everything you need to know about tackling electrical wiring projects in your own home. From understanding the basics of electrical systems to learning how to safely and effectively wire outlets, switches, and fixtures, this handbook will empower you to take on DIY wiring projects with confidence.
Understanding Electrical Systems
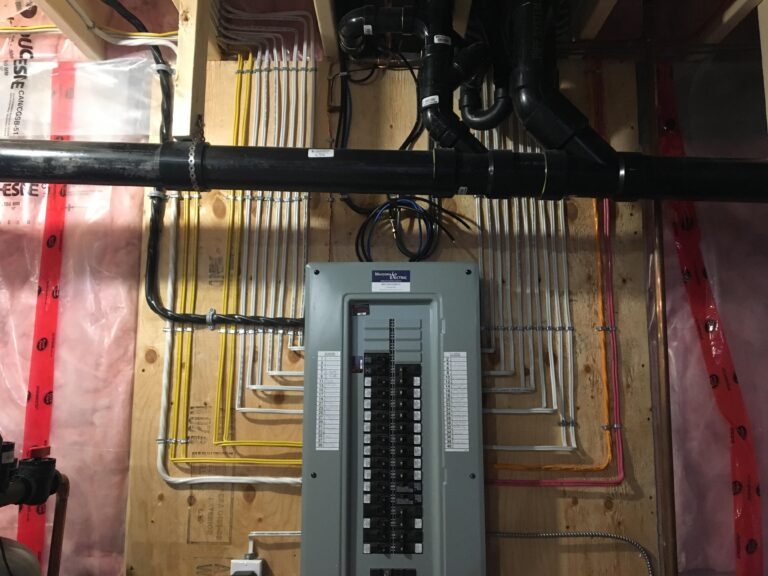
Before diving into any DIY wiring project, it is essential to have a solid understanding of electrical systems. Electrical systems consist of three main components: the power source, the wiring, and the load. The power source typically comes from the utility company and is delivered to your home through a main electrical panel. From there, the wiring distributes the electrical current to various outlets, switches, and fixtures throughout your home. The load refers to the devices and appliances that consume the electrical power.
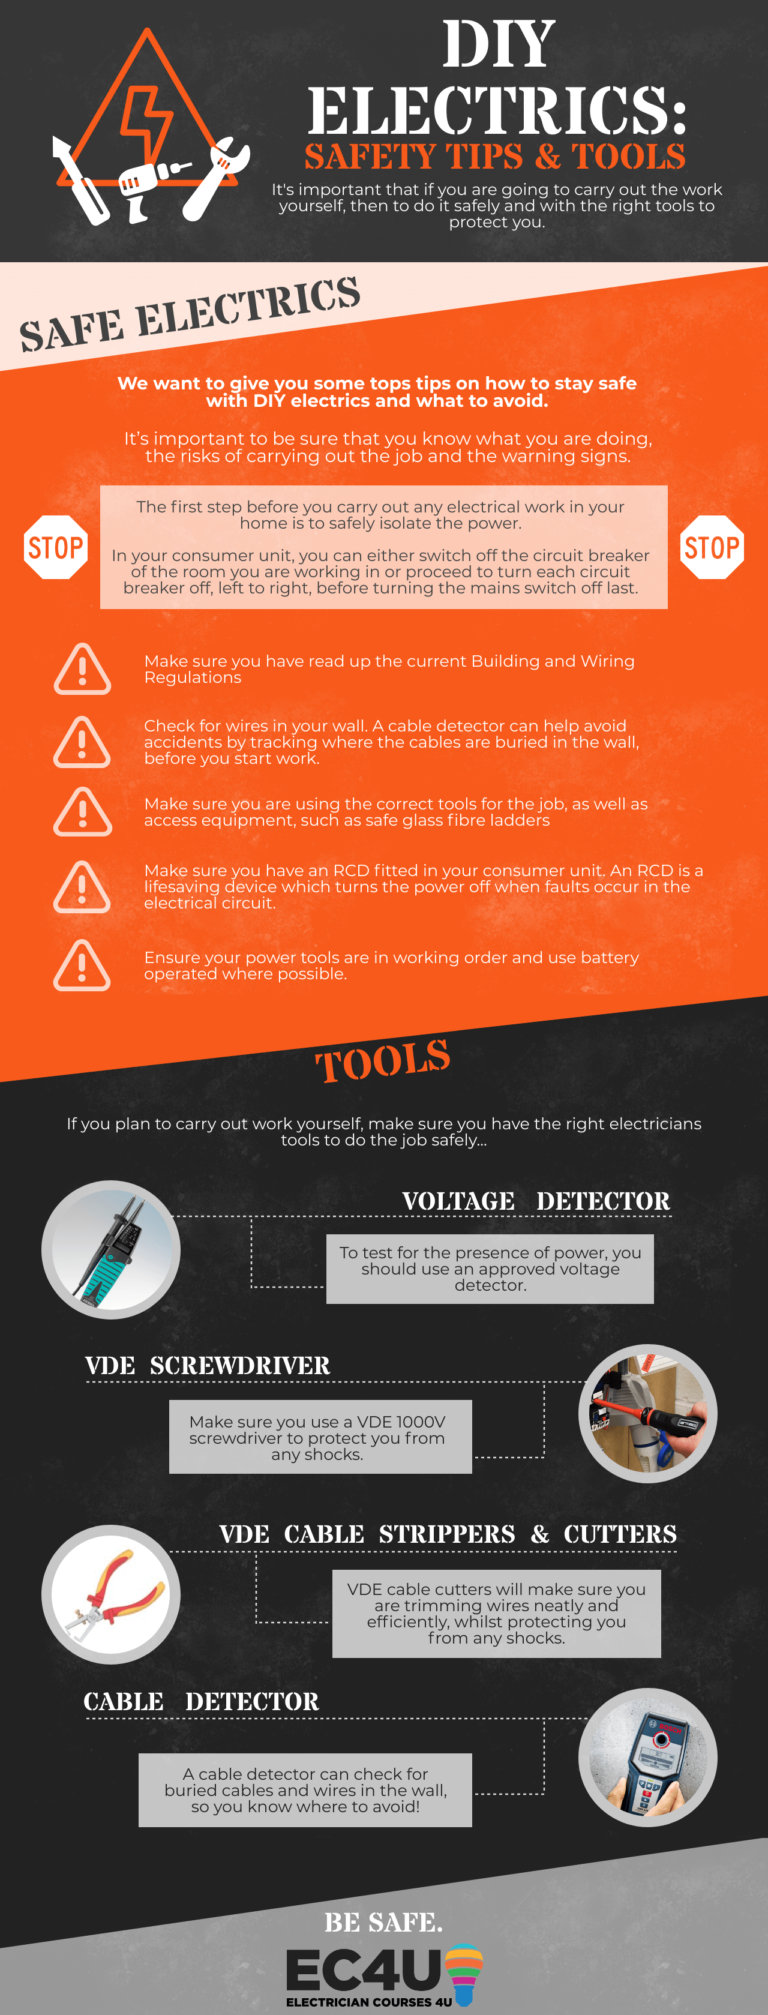
When working with electrical systems, it is crucial to prioritize safety. Always turn off the power to the circuit you will be working on at the main electrical panel. Use a voltage tester to confirm that the power is indeed off before beginning any wiring project. Additionally, ensure that you have the necessary tools and equipment, such as wire strippers, electrical tape, and wire nuts, to complete the job safely and efficiently.
The Basics of Electrical Wiring
Now that you have a foundational understanding of electrical systems, let’s delve into the basics of electrical wiring. Electrical wiring consists of conductors, which are typically copper or aluminum wires that carry the electrical current. These wires are enclosed in a protective sheath to prevent accidental contact and damage. When it comes to DIY wiring, it is essential to choose the correct wire gauge for the specific application. Thicker wires with lower gauge numbers can carry more current and are typically used for larger appliances and circuits, while thinner wires with higher gauge numbers are suitable for smaller devices and lighting fixtures.
When working with electrical wiring, it is crucial to follow specific codes and regulations to ensure safety and compliance. Familiarize yourself with the National Electrical Code (NEC) and any local building codes that may apply to your area. These codes outline the proper installation techniques, wire color coding, and grounding requirements, among other important guidelines. Adhering to these codes will help prevent electrical hazards and ensure that your wiring projects meet the necessary standards.
Wiring Outlets and Switches
One of the most common DIY wiring projects homeowners undertake is wiring outlets and switches. Whether you need to replace an existing outlet or add a new one, the process involves a few key steps. First, turn off the power to the circuit at the main electrical panel and use a voltage tester to confirm that the power is off. Then, remove the cover plate and unscrew the outlet or switch from the electrical box. Carefully disconnect the wires, making note of their location and connections.
Next, prepare the new outlet or switch by stripping the insulation off the wire ends and attaching them to the appropriate terminals. The black (hot) wire connects to the brass or gold-colored terminal, the white (neutral) wire connects to the silver-colored terminal, and the green or bare (ground) wire connects to the green screw or grounding terminal. Once the wires are securely connected, carefully tuck them back into the electrical box, screw the outlet or switch into place, and replace the cover plate.
It is crucial to follow proper wiring techniques and ensure that all connections are secure. Loose or improper connections can lead to electrical malfunctions and pose safety hazards. If you feel uncomfortable or unsure about any aspect of wiring outlets and switches, it is always best to consult a licensed electrician.
Wiring Light Fixtures
Adding or replacing light fixtures is another common DIY wiring project that homeowners often undertake. Whether you are installing a ceiling fan, a chandelier, or a simple light fixture, the process involves similar steps. As always, start by turning off the power to the circuit and confirming that it is off using a voltage tester.
Begin by removing the existing light fixture, if applicable, by unscrewing the mounting bracket and disconnecting the wires. Next, assemble the new light fixture according to the manufacturer’s instructions, ensuring that you follow proper wiring techniques. Typically, the black or colored wire connects to the black (hot) wire, the white wire connects to the white (neutral) wire, and the green or bare wire connects to the grounding wire or screw. Double-check all connections and secure them with wire nuts.
Once the wiring is complete, attach the new light fixture to the mounting bracket and secure it in place. Finally, turn the power back on at the main electrical panel and test the light fixture to ensure proper operation.
Throughout the entire DIY wiring process, it is crucial to prioritize safety, attention to detail, and adherence to electrical codes. By following the guidelines outlined in this practical handbook, you will be well-equipped to tackle a wide range of DIY wiring projects in your home. Remember, if you ever feel unsure or uncomfortable, it is always best to consult a professional electrician to ensure the safety and integrity of your electrical system.
Key Takeaways: DIY Wiring 101
- Always prioritize safety when working with electrical wiring.
- Understand the basics of electrical circuits and wiring diagrams.
- Properly plan and map out your wiring project before starting.
- Use appropriate tools and materials for the job.
- Consult a professional electrician if you’re unsure or encounter complex issues.
Frequently Asked Questions
1. What are the basic tools needed for DIY wiring?
When it comes to DIY wiring, having the right tools is essential. Here are some basic tools that homeowners should have:
Firstly, a good quality voltage tester is crucial for checking if the power is off before starting any work. A wire stripper is also necessary for removing the insulation from wires. Additionally, a set of screwdrivers, both flathead and Phillips, is needed for loosening and tightening screws. Don’t forget to have a wire cutter on hand for cutting wires to the desired length. Lastly, make sure to have electrical tape for insulating exposed wires.
2. How can I ensure my safety when working with electricity?
Working with electricity can be dangerous, so it’s important to prioritize safety. Here are some tips to ensure your safety:
Always turn off the power at the circuit breaker before starting any electrical work. Use a voltage tester to confirm that the power is off. Wear protective gloves and goggles to protect yourself from potential hazards. Avoid working in wet conditions and make sure your hands are dry before handling any electrical components. Never touch exposed wires with bare hands. Lastly, if you’re unsure or uncomfortable with any electrical task, it’s best to hire a professional electrician.
3. How can I identify the different types of wires?
Identifying the different types of wires is crucial for proper wiring. Here’s a quick guide:
The most common types of wires are black, white, and green. Black wires are typically used for hot wires and carry electrical current. White wires are neutral wires that complete the circuit. Green wires, or bare copper wires, are used for grounding. It’s important to note that the color coding may vary, so it’s best to consult the wiring diagram or follow the instructions in the handbook to ensure proper identification.
4. Can I replace a light fixture myself?
Replacing a light fixture is a common DIY task that many homeowners can do themselves. Here’s a step-by-step guide:
Firstly, turn off the power to the light fixture at the circuit breaker. Remove the existing light fixture by unscrewing the mounting screws and disconnecting the wires. Take note of which wires are connected to which terminals. Install the new light fixture by connecting the wires to the corresponding terminals and securing them with wire nuts. Finally, mount the new light fixture to the ceiling or wall using the provided hardware. Remember to turn the power back on and test the light fixture to ensure it’s working properly.
5. How can I troubleshoot electrical issues in my home?
Electrical issues can be frustrating, but there are some steps you can take to troubleshoot them:
Start by checking if the circuit breaker has tripped or if a fuse has blown. Reset or replace them if necessary. Inspect the wiring for any signs of damage or loose connections. If you find any issues, tighten the connections or replace the damaged wiring. Use a voltage tester to check if there is power at the outlet or switch. If there is no power, there may be a problem with the wiring or the device itself. In such cases, it’s best to consult a professional electrician for further assistance.
Electrical Wiring Basics
Final Summary: A Practical Handbook for Homeowners
So there you have it, DIY Wiring 101: A Practical Handbook for Homeowners. We’ve covered the basics of electrical wiring, from understanding circuits and wires to safety precautions and troubleshooting tips. Whether you’re a seasoned DIY enthusiast or a newbie homeowner looking to take control of your electrical projects, this handbook is your go-to resource.
By following the step-by-step instructions and guidelines outlined in this handbook, you can confidently tackle electrical wiring tasks in your home. From installing light switches and outlets to wiring appliances and fixtures, you’ll be equipped with the knowledge and skills to handle these projects with ease. And with the added bonus of saving money on professional electrician fees, you’ll be able to invest those savings in other home improvement endeavors.
Remember, safety should always be your top priority when working with electricity. Take the necessary precautions, use the right tools, and consult a professional if you’re unsure about any aspect of the wiring process. With practice and patience, you’ll become more proficient in DIY wiring, allowing you to enhance your home and take pride in your accomplishments.
So, go ahead, grab your tools, and start exploring the world of DIY wiring. You’ll be amazed at what you can achieve and the confidence you’ll gain as a homeowner. Happy wiring!