Lighting Your Path: DIY Wiring For Outdoor Spaces
Let’s shed some light on the topic of DIY wiring for outdoor spaces. Creating a well-lit and inviting outdoor area is not only aesthetically pleasing but also enhances safety and functionality. Whether you’re looking to illuminate your garden path or set the mood for a cozy evening on the patio, proper outdoor lighting is key. In this article, we’ll explore the ins and outs of DIY wiring for outdoor spaces, sharing valuable tips and tricks along the way to help you navigate this illuminating journey.
When it comes to outdoor lighting, the possibilities are endless. From string lights to pathway markers, there are numerous options to choose from. However, before diving into the world of DIY wiring, it’s essential to understand the basics. We’ll cover everything from selecting the right wiring materials to ensuring proper installation techniques. So, grab your toolbox and get ready to brighten up your outdoor space with our comprehensive guide to DIY wiring for outdoor spaces. Let’s get started!
How To Wire Outdoor Lighting:
- Plan your lighting design: Determine where you want to place your lights and create a layout.
- Gather the necessary materials: This includes outdoor-rated wire, connectors, a transformer, and lighting fixtures.
- Turn off the power: Before you begin, make sure to turn off the power to the area where you’ll be working.
- Run the wire: Carefully run the wire from the transformer to each lighting fixture, hiding it as much as possible.
- Connect the wire: Use connectors to join the wire to the lighting fixtures, ensuring a secure connection.
- Test the lights: Once everything is connected, turn the power back on and test each light to ensure they’re working properly.
- Enjoy your outdoor lighting: Sit back and enjoy the beautiful ambiance your DIY wiring has created.
Lighting Your Path: DIY Wiring for Outdoor Spaces
Outdoor spaces can be transformed into magical settings with the right lighting. Whether you have a small garden or a spacious backyard, DIY wiring can help you create a warm and inviting atmosphere for outdoor gatherings or simply enjoying the evening breeze. In this article, we will guide you through the process of DIY wiring for outdoor spaces, providing you with valuable tips and step-by-step instructions.
Planning Your Outdoor Lighting
Before diving into the DIY wiring process, it’s important to plan your outdoor lighting layout. Consider the purpose of the lighting, whether it’s to illuminate pathways, highlight landscaping features, or create a cozy ambiance. Take a walk around your outdoor space during different times of the day to determine where lighting is needed the most. Make a sketch or use a digital design tool to visualize your lighting plan.
When planning your outdoor lighting, keep in mind the safety aspect as well. Ensure that the wiring is properly grounded and protected from the elements. It’s also important to consider energy efficiency by opting for LED lights and installing timers or motion sensors to reduce energy consumption.
Choosing the Right Wiring and Fixtures
One of the crucial aspects of DIY outdoor wiring is choosing the right wiring and fixtures. Outdoor lighting fixtures should be specifically designed for outdoor use, as they are built to withstand various weather conditions. Look for fixtures with IP (Ingress Protection) ratings that indicate their level of protection against dust and water.
When it comes to wiring, use outdoor-rated cables that are UV resistant and designed for direct burial. These cables are typically labeled as UF (Underground Feeder) cables and are suitable for outdoor installations. It’s essential to follow local building codes and regulations regarding the type of wiring and conduit required for outdoor lighting projects.
Mapping Out the Wiring Path
Once you have your lighting plan and the necessary fixtures and wiring, it’s time to map out the wiring path. Start by identifying the power source, which can be an existing outdoor outlet or a dedicated circuit. Determine the best route for the wiring, considering factors such as accessibility and aesthetics.
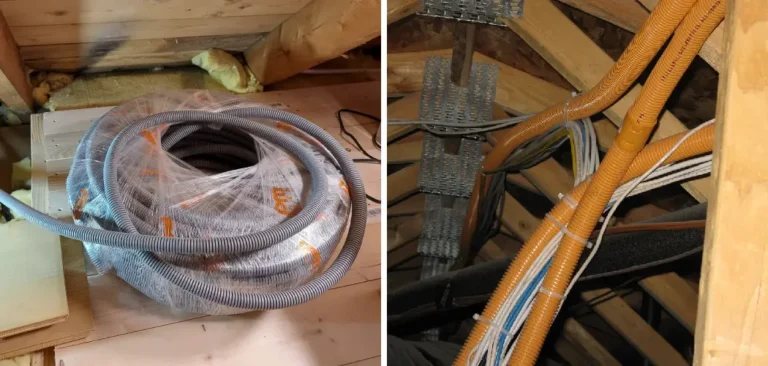
Dig a trench that is deep enough to accommodate the wiring and bury it at least 18 inches underground. Use conduit for added protection and to comply with local codes. Lay the wiring in the trench, making sure to leave a few feet of extra cable at each fixture location for easy installation.
Installing Outdoor Lighting Fixtures
With the wiring in place, it’s time to install your outdoor lighting fixtures. Begin by attaching the fixtures to their designated locations, following the manufacturer’s instructions. Ensure that the fixtures are securely fastened and properly aligned.
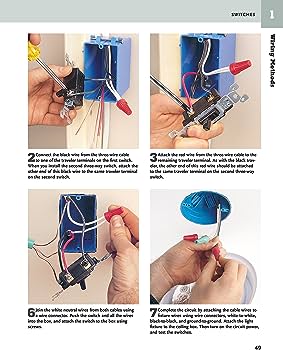
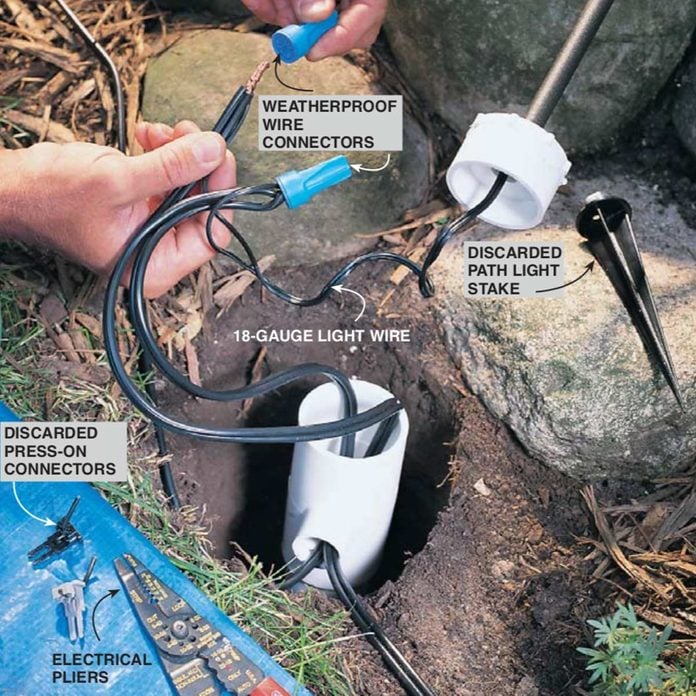
Next, connect the wiring to each fixture. Strip the ends of the wires and use wire connectors to join the corresponding wires together. Make sure to match the colors of the wires (e.g., black to black, white to white, and green to green for grounding). Use electrical tape to secure the connections and protect them from moisture.
Testing and Adjusting the Lighting
Before burying the wiring and covering the trench, it’s crucial to test the lighting and make any necessary adjustments. Turn on the power and check if all the fixtures are working properly. Adjust the position and angle of the fixtures to achieve the desired lighting effect. Take the time to experiment with different configurations and intensities to create the perfect ambiance for your outdoor space.
Maintaining Outdoor Lighting
Proper maintenance is essential to ensure the longevity and efficiency of your outdoor lighting. Regularly inspect the fixtures for any signs of damage or wear, such as loose connections or cracked lenses. Clean the fixtures and remove any debris or dirt that may affect their performance. Replace any faulty bulbs promptly to maintain consistent lighting.
Additionally, consider incorporating a lighting control system to automate and manage your outdoor lighting. This can include timers, motion sensors, or even smart home integration for convenient control and energy savings.
Benefits of DIY Wiring for Outdoor Spaces
Embarking on a DIY wiring project for your outdoor spaces offers several benefits. Firstly, it allows you to customize the lighting to suit your specific needs and preferences. You have the freedom to choose the fixtures, the placement, and the intensity of the lighting, creating a truly unique outdoor ambiance.
DIY wiring also provides cost savings compared to hiring a professional electrician. By investing your time and effort, you can achieve professional-looking results without breaking the bank. Additionally, as you gain experience with DIY projects, you can expand your skills and tackle more complex outdoor lighting installations in the future.
Tips for a Successful DIY Wiring Project
To ensure a successful DIY wiring project for your outdoor spaces, keep the following tips in mind:
1. Always follow local building codes and regulations for outdoor wiring installations.
2. Use outdoor-rated fixtures and wiring that are designed for outdoor use and can withstand the elements.
3. Take safety precautions, such as grounding the wiring and protecting it from moisture.
4. Test the lighting before burying the wiring and adjust the fixtures as needed.
5. Regularly inspect and maintain the outdoor lighting to ensure its longevity and efficiency.
By following these tips and taking the time to plan and execute your DIY wiring project carefully, you can create a stunning outdoor space that is both functional and aesthetically pleasing.
Conclusion
With DIY wiring for outdoor spaces, you can illuminate your pathways, accentuate your landscaping features, and create a cozy atmosphere for outdoor gatherings. By carefully planning your lighting layout, choosing the right fixtures and wiring, and following proper installation techniques, you can achieve professional-looking results without the need for a professional electrician. So, get creative and transform your outdoor space with DIY wiring and beautiful lighting.
Key Takeaways: Lighting Your Path: DIY Wiring for Outdoor Spaces
- 1. Safety first! Always turn off the power before working on any electrical wiring.
- 2. Plan your lighting layout carefully to ensure adequate coverage and proper placement.
- 3. Use weatherproof materials and connectors to protect your outdoor wiring from the elements.
- 4. Follow the manufacturer’s instructions and local electrical codes when installing outdoor lighting.
- 5. If you’re unsure or uncomfortable with DIY wiring, consult a professional electrician for assistance.
Frequently Asked Questions
1. What safety precautions should I take when wiring outdoor lighting?
When working with outdoor lighting wiring, it is important to prioritize safety. Here are a few precautions to keep in mind:
Firstly, always make sure to turn off the power to the area where you will be working. This can be done by flipping the corresponding circuit breaker. Additionally, use a voltage tester to double-check that the power is truly off before proceeding.
Secondly, make sure to use outdoor-rated wiring and fixtures that are designed to withstand the elements. This will help prevent any issues caused by exposure to moisture or extreme temperatures.
2. What tools and materials do I need for DIY wiring for outdoor lighting?
Before starting your outdoor lighting project, gather the necessary tools and materials. Here are some essentials:
You will need a screwdriver, wire strippers, wire connectors, electrical tape, and a voltage tester. Additionally, make sure to have outdoor-rated wiring, such as UF-B or THWN-2, as well as waterproof electrical boxes and conduit.
3. Can I install outdoor lighting without burying the wiring?
Yes, it is possible to install outdoor lighting without burying the wiring. One option is to use above-ground conduit to protect and conceal the wiring. This can be a good solution for temporary lighting setups or areas where burying the wiring is not feasible.
However, keep in mind that above-ground wiring may be more susceptible to damage from weather conditions and other hazards. It is important to choose durable and weather-resistant materials and ensure proper grounding for safety.
4. How do I plan the layout for my outdoor lighting?
Planning the layout for your outdoor lighting is crucial for achieving the desired effect. Start by considering the areas you want to illuminate and the purpose of the lighting – whether it’s for functional or aesthetic purposes.
Sketch out a rough plan of your outdoor space, marking the key features you want to highlight. Take into account the power source and consider the wiring routes that will be least obtrusive. It can also be helpful to consult lighting design resources or seek professional advice for optimal placement and spacing of fixtures.
5. Are there any specific regulations or codes to follow when wiring outdoor lighting?
Yes, there are specific regulations and codes to follow when wiring outdoor lighting. These may vary depending on your location, so it is important to consult local building codes or contact a licensed electrician for guidance.
Common regulations include the use of waterproof electrical boxes, proper grounding, and adherence to maximum wire fill capacities. It is crucial to follow these regulations to ensure the safety and compliance of your outdoor lighting installation.
How to Install Outdoor Landscape Lighting | Ask This Old House
Final Thoughts
In the world of outdoor lighting, DIY wiring can be both intimidating and rewarding. Throughout this article, we’ve explored the importance of proper wiring for outdoor spaces and provided you with valuable tips and insights to help you tackle this project with confidence.
Remember, safety should always be your top priority when working with electricity. By following the necessary precautions and guidelines, you can ensure that your outdoor lighting not only illuminates your path but also enhances the beauty and functionality of your space.
So, whether you’re illuminating a pathway, highlighting your garden, or creating a cozy ambiance for your outdoor gatherings, don’t shy away from DIY wiring. With the knowledge you’ve gained and a little bit of patience, you can bring your vision to life and transform your outdoor space into a magical oasis.
In conclusion, embrace the opportunity to create a warm and inviting atmosphere in your outdoor spaces through DIY wiring. Take the time to plan your lighting design, gather the necessary materials, and follow the proper steps for a safe and successful installation. The satisfaction of seeing your pathway come to life with your own handiwork will be well worth the effort. So go ahead, let your creativity shine and light up your outdoor world!